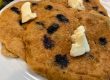
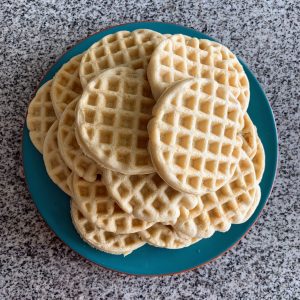
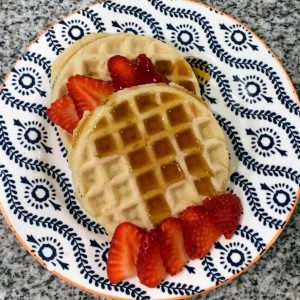
Navigating food allergies can be a daunting task, especially when it comes to meal planning, but fear not! If you’re looking for an allergen-friendly breakfast recipe that’s easy to make, you’ve come to the right place. These gluten-free waffles are so delicious you’ll be asking yourself if they’re actually gluten free and vegan. Make them fluffy or cook them long enough to be crispy, eat them fresh or make a large batch to store in your freezer and reheat throughout the week, top them with delicious maple syrup, or your favorite cut up fruit – you can’t go wrong with these waffles, they’re sure to satisfy your craving for a yummy breakfast.
After discovering my son’s allergies, it has been a bit of a challenge to know what to make our family for meals all the time, especially breakfast. Eggs and milk are huge breakfast foods and they’re in EVERYTHING. I grew up eating my mom’s homemade waffles almost every morning, so I wanted to find something just as yummy that worked for us. Unfortunately, all the waffle and pancake recipes I tried in the beginning were total duds. Almost every egg-free recipe I found stuck to my waffle makers so badly, it was incredibly frustrating. Overtime I came across a few that I’ve liked, but I’ve still had to modify them quite a bit to get just the right consistency of batter, or to taste good without just being completely chalk full of sugar.
In October, my husband started reacting to wheat really badly. He tested negative to wheat allergy, and his celiac test came back negative as well, but anything with wheat in it totally takes him out of commission for hours or even days. Add in this, and it totally threw off my waffle and pancake game AGAIN.
Needless to say, I experimented with some recipes that had worked for us before with different gluten free flours and after adjusting a few of the ratios, I finally came up with this version. When I made them, my husband bit into a waffle and immediately looked at me with a little bit of fear in his eyes and asked, “are you sure these are gluten-free? They taste really good…”
I discovered that these waffles freeze SUPER well, all you have to do is pop them in the toaster and they taste just as fresh as the day they were made! I love to make a double batch of batter, cook all the waffles, and then freeze them in a gallon size freezer bag. It makes it so easy for a tired morning, or when we’re trying to get out the door fast and need something quick to eat.
Though food allergies have been somewhat difficult to navigate, finding our FAV’s that work for ALL of us feels like a huge accomplishment and it’s why I want to share all of them with you!
What Makes This Recipe So Great
- Egg, Dairy, & Gluten Free: Despite being free from these top allergens, it’s still tastes so good!
- Easy To Make: This recipe doesn’t require weird substitutes for egg replacements which I’ve found often alter the flavor or texture too much to be enjoyable.
- It’s Delicious: Even people who don’t have dietary restrictions or allergies comment on how yummy these waffles are.
- Convenient: Make a huge batch ahead of time for meal prep and keep a bunch of frozen waffles in your own freezer! They’re easy to reheat in the toaster for a quick breakfast.
Ingredients & How to Substitute
- Dairy-Free Milk – There’s a whole array of dairy-free milk options out there. I like to use soy milk because it isn’t one of our family’s allergens, but if you can’t do soy I’ve also made this recipe with a pea protein based plant milk and it turned out perfectly. I would guess the best plant based replacement is rice milk, but I’m sure oat milk or nut milks would work great as well. If you don’t have dairy issues, this recipe is also probably still great with cows milk or real buttermilk.
- Apple Cider Vinegar – The acidity in vinegar reacts with your vegan milk to make it curdle, giving it a similar flavor and texture to buttermilk. If you don’t have apple cider vinegar, you can use white vinegar or even lemon juice.
- Gluten-Free Flour – I like to use a good 1:1 replacement gluten-free rice flour blend in my recipes. You can probably use a gluten-free oat flour instead, or if you don’t have problems with wheat, you could use a wheat flour.
- Baking Powder – This will make your waffles nice and fluffy
- Salt – This will help add and enhance the flavor of your waffles.
- Maple Syrup – This will help make your waffles sweet. If I don’t have maple syrup, I use coconut sugar, but brown or white sugar can be used instead as well.
- Vegan Butter – I love the flavor of normal butter, so I like to use butter replacements that taste the same. If you don’t have any vegan butter on hand you can use a mild tasting oil like avocado oil or vegetable oil. If you can do dairy, normal butter is also fine.
- Vanilla Extract – Vanilla is so good in baking, definitely don’t skip this ingredient!
Some Recipe Tips
This recipe can be rather dry unless you have enough dairy-free milk. If your batter is extra thick, just add a little milk and then mix it again and see if it improves. Do this until it’s a consistency you like. Even with a thick batter, the waffles cook just fine, but it’s harder to get the batter in the waffle iron for sure, so I like mine to be a bit runnier in consistency.
Freezing Your Waffles
These waffles freeze incredibly well. After cooking them in the waffle iron, if you want to minimize moisture condensation, cool them down on a wire rack. Once cooled down you’ll want to freeze them in a single layer in the freezer otherwise they will stick together when you try to pull them out. Once frozen, you can throw them all in a gallon size freezer bag and easily take a few out for breakfast as needed! Ours don’t normally stay in our freezer for more than a few weeks cause we end up eating them so quickly, but you can freeze them for a few months just fine.
Vegan Buttermilk Waffles
Ingredients
- 2 cups dairy-free milk I use unsweetened soy milk, but any vegan milk should work great!
- 2 tsps apple cider vinegar or lemon juice
- 2 cups gluten-free flour I recommend a good 1:1 normal flour replacement
- 1 tbsp baking powder
- 1/2 tsp salt
- 1 tbsp maple syrup
- 1/4 cup vegan butter or a mild tasting oil, I like to use avocado oil if I don't have any vegan butter on hand
- 1/2 tsp vanilla extract
Instructions
- Mix your dairy-free milk and apple cider vinegar together and set aside for 5-10 minutes for the buttermilk to form.
- Mix your dry ingredients together: gf flour, baking powder, and salt.
- Add maple syrup, melted vegan butter, and vanilla to the buttermilk and mix.
- Combine the wet and dry ingredients. If the batter seems too thick or dry, add a little extra dairy-free milk until it is a slightly runny consistency.
- Add batter to a preheated waffle iron and cook according to the waffle iron directions.
- Top with vegan butter, maple syrup, & fresh fruit and enjoy!